Python
Venvs
Virtual environments (or venvs) allow Python projects to have isolated dependencies and packages, which can help prevent conflicts between projects and package versions.
There are two ways to set up a virtual environment in VSCode.
Creating a Virtual Environment via VSCode - Recommended
If you use VSCode, the first and best way to create a venv is through VSCode. The steps are:
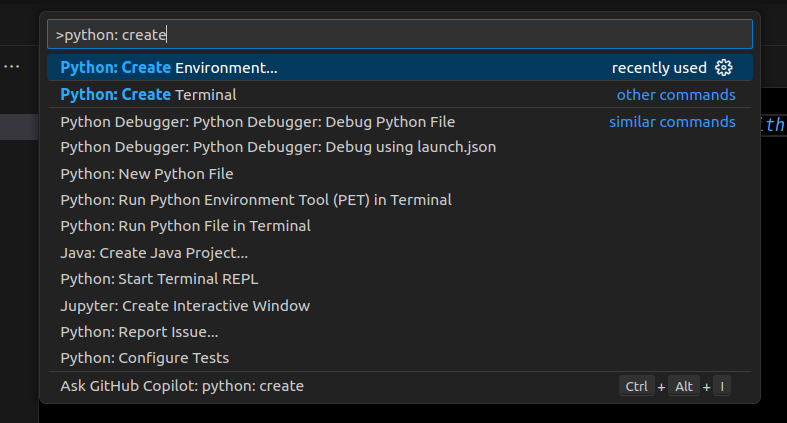
press Ctrl-Shift-P (or Cmd-Shift-P on Mac) to open the command palette
search for ‘Python: Create Environment’
select Venv
either select a Python interpreter or enter the path to one.
We recommend selecting Python 3.12 as that is the version with the best support for PolyAPI as of 2025-09-01.
Creating a Virtual Environment via CLI
The other way to create a venv is via the terminal by creating a folder for your environment and running:
$ python -m venv /path/to/new/virtual/environment
This method is NOT recommended if you are using VSCode, as VSCode Intellisense will not play nicely with venvs created this way unless you do additional setup.
Using a Virtual Environment
If you are using a venv created via VSCode, you can skip this section as VSCode will automatically activate the venv for you when you open a new terminal inside VSCode.
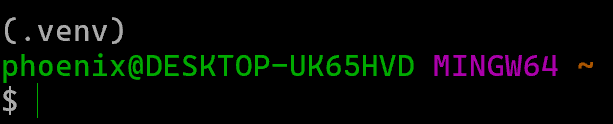
If you see the pink text matching your project name in the VSCode terminal prompt, you are good to go!
Otherwise, if you created your venv via the terminal, you will need to activate it manually with one of the following commands:
(Replace ‘venv’ with the name of your virtual environment):
Linux/MacOS:
$ source venv/bin/activate
Windows Powershell:
$ ./venv/Scripts/Activate.ps1
Windows Command Prompt:
$ call venv/Scripts/activate
Windows Git Bash:
$ source venv/Scripts/activate
After activating your virtual environment, you may see the name of the active environment in your terminal like so:
To ensure that your virtual environment is working properly, you can run this command while your environment is active:
$ which python
If the returned path points to your virtual environment, you are good to go!
To leave your venv, use this command:
$ deactivate
For more information about virtual environments, see the official Python documentation.
Install
Now, let’s install the Python library!
(If you already installed the VSCode extension, the extension setup may have already installed the library.)
Run this command to ensure the python library is installed:
$ pip install polyapi-python
Caution
Please be sure to install the correct polyapi pypi package polyapi-python, as there are other registered packages with similar names.
Note
If you see an error like this:
ERROR: Could not find a version that satisfies the requirement polyapi-python (from versions: none)
ERROR: No matching distribution found for polyapi-python
Or like this:
ERROR: Ignored the following versions that require a different python version
It’s probably because you are using an older version of Python!
Use python --version to check your Python version. polyapi-python requires Python 3.10 or higher.
Warning
On MacOS, as of 2024-10-28, Python 3.13 (released on 2024-10-07) does not work very well yet.
We recommend using Python 3.12 for now.
Setup and Generate
Next, we need to make sure the PolyAPI Python client is properly configured:
$ python -m polyapi setup
Enter your server and API Key when prompted.
Next, let’s go ahead and retrieve all the trained Poly functions and generate the Python SDK for them:
$ python -m polyapi generate
You can also generate an SDK with specific contexts using the --contexts parameter:
$ python -m polyapi generate --contexts "context1,context2,context3"
The generation process will:
Only fetch specifications for the specified contexts
Generate Python files for the resources in those contexts
Create a context-aware directory structure where resources are organized by their contexts
Generate appropriate index files that expose the resources in a hierarchical structure
This is particularly useful when you want to:
Generate a smaller, more focused SDK
Only include specific parts of your API
Reduce the size of the generated code
Improve build times by excluding unused contexts
Warning
Your api key is stored inside your PolyAPI library wherever it is installed (usually site_packages) in a file name .config.env
Do not commit this file to your git repo.
Develop First Function
Next, let’s develop our first custom function!
Open a new file called hello.py and add the following code:
def hello():
    return "Hello Poly World!"
Next use the PolyAPI Python SDK to deploy this function:
$ python -m polyapi function add hello hello.py --context mycontext --server
You should get back output like this:
Adding custom server side function... DEPLOYED
Function ID: 1111111-73ae-4463-aaa4-fdbdc9accd62
Generating TypeScript SDK...DONE
That’s it! You’ve now deployed your first server function!
Note
Setting Runtime API Key
You can specify a runtime API key for your function using the --execution-api-key parameter:
$ python -m polyapi function add hello hello.py --context mycontext --server --execution-api-key my-api-key
This is particularly useful when you want to specify an API key with specific permissions that the developer deploying the function might not necessarily possess. The runtime API key will be used when the function executes, allowing for more granular permission control.
Client Functions are another type of PolyAPI function that can be deployed in a similar way with the --client option.
Run First Function
Finally, let’s open a new file called “run.py” and add the following code:
from polyapi import poly
print(poly.mycontext.hello())
Now run the python file:
$ python run.py
You should see “Hello Poly World!” printed in the console!
Using Logs
When testing or debugging server functions, it can be helpful to log information. However, print statements will not show up in the console, as the function is being executed on the server instead of in your console. Lets create a function with a print to demonstrate!
def hello():
   print("Hello Poly World!")
   return "Hello Poly World!"
After deploying and running this function, you can find this log by clicking on the ‘Show logs’ button on your function in canopy.
Onward
That’s it! You have now:
Setup a virtual environment
Setup your Python SDK
Trained your first server function
Ran your first server function
Learned how to log information
This is the last step on the guided tour of Poly.
To further explore aspects of Poly and what it can do, head over to Next Steps.