Managing Jobs
To manage jobs on PolyAPI, head to this path on your instance:
/canopy/polyui/login
For example, on na1, the path would be:
https://na1.polyapi.io/canopy/polyui/login
Enter your api key to login and let’s begin!
Note
You must have the “Manage Jobs” permission to manage jobs.
Please contact your tenant administrator or support@polyapi.io if you need these permissions added!
Create a Job - Name and Schedule
First click “Jobs” in the sidebar, then click “+ Create”.
You should see an interface like this:
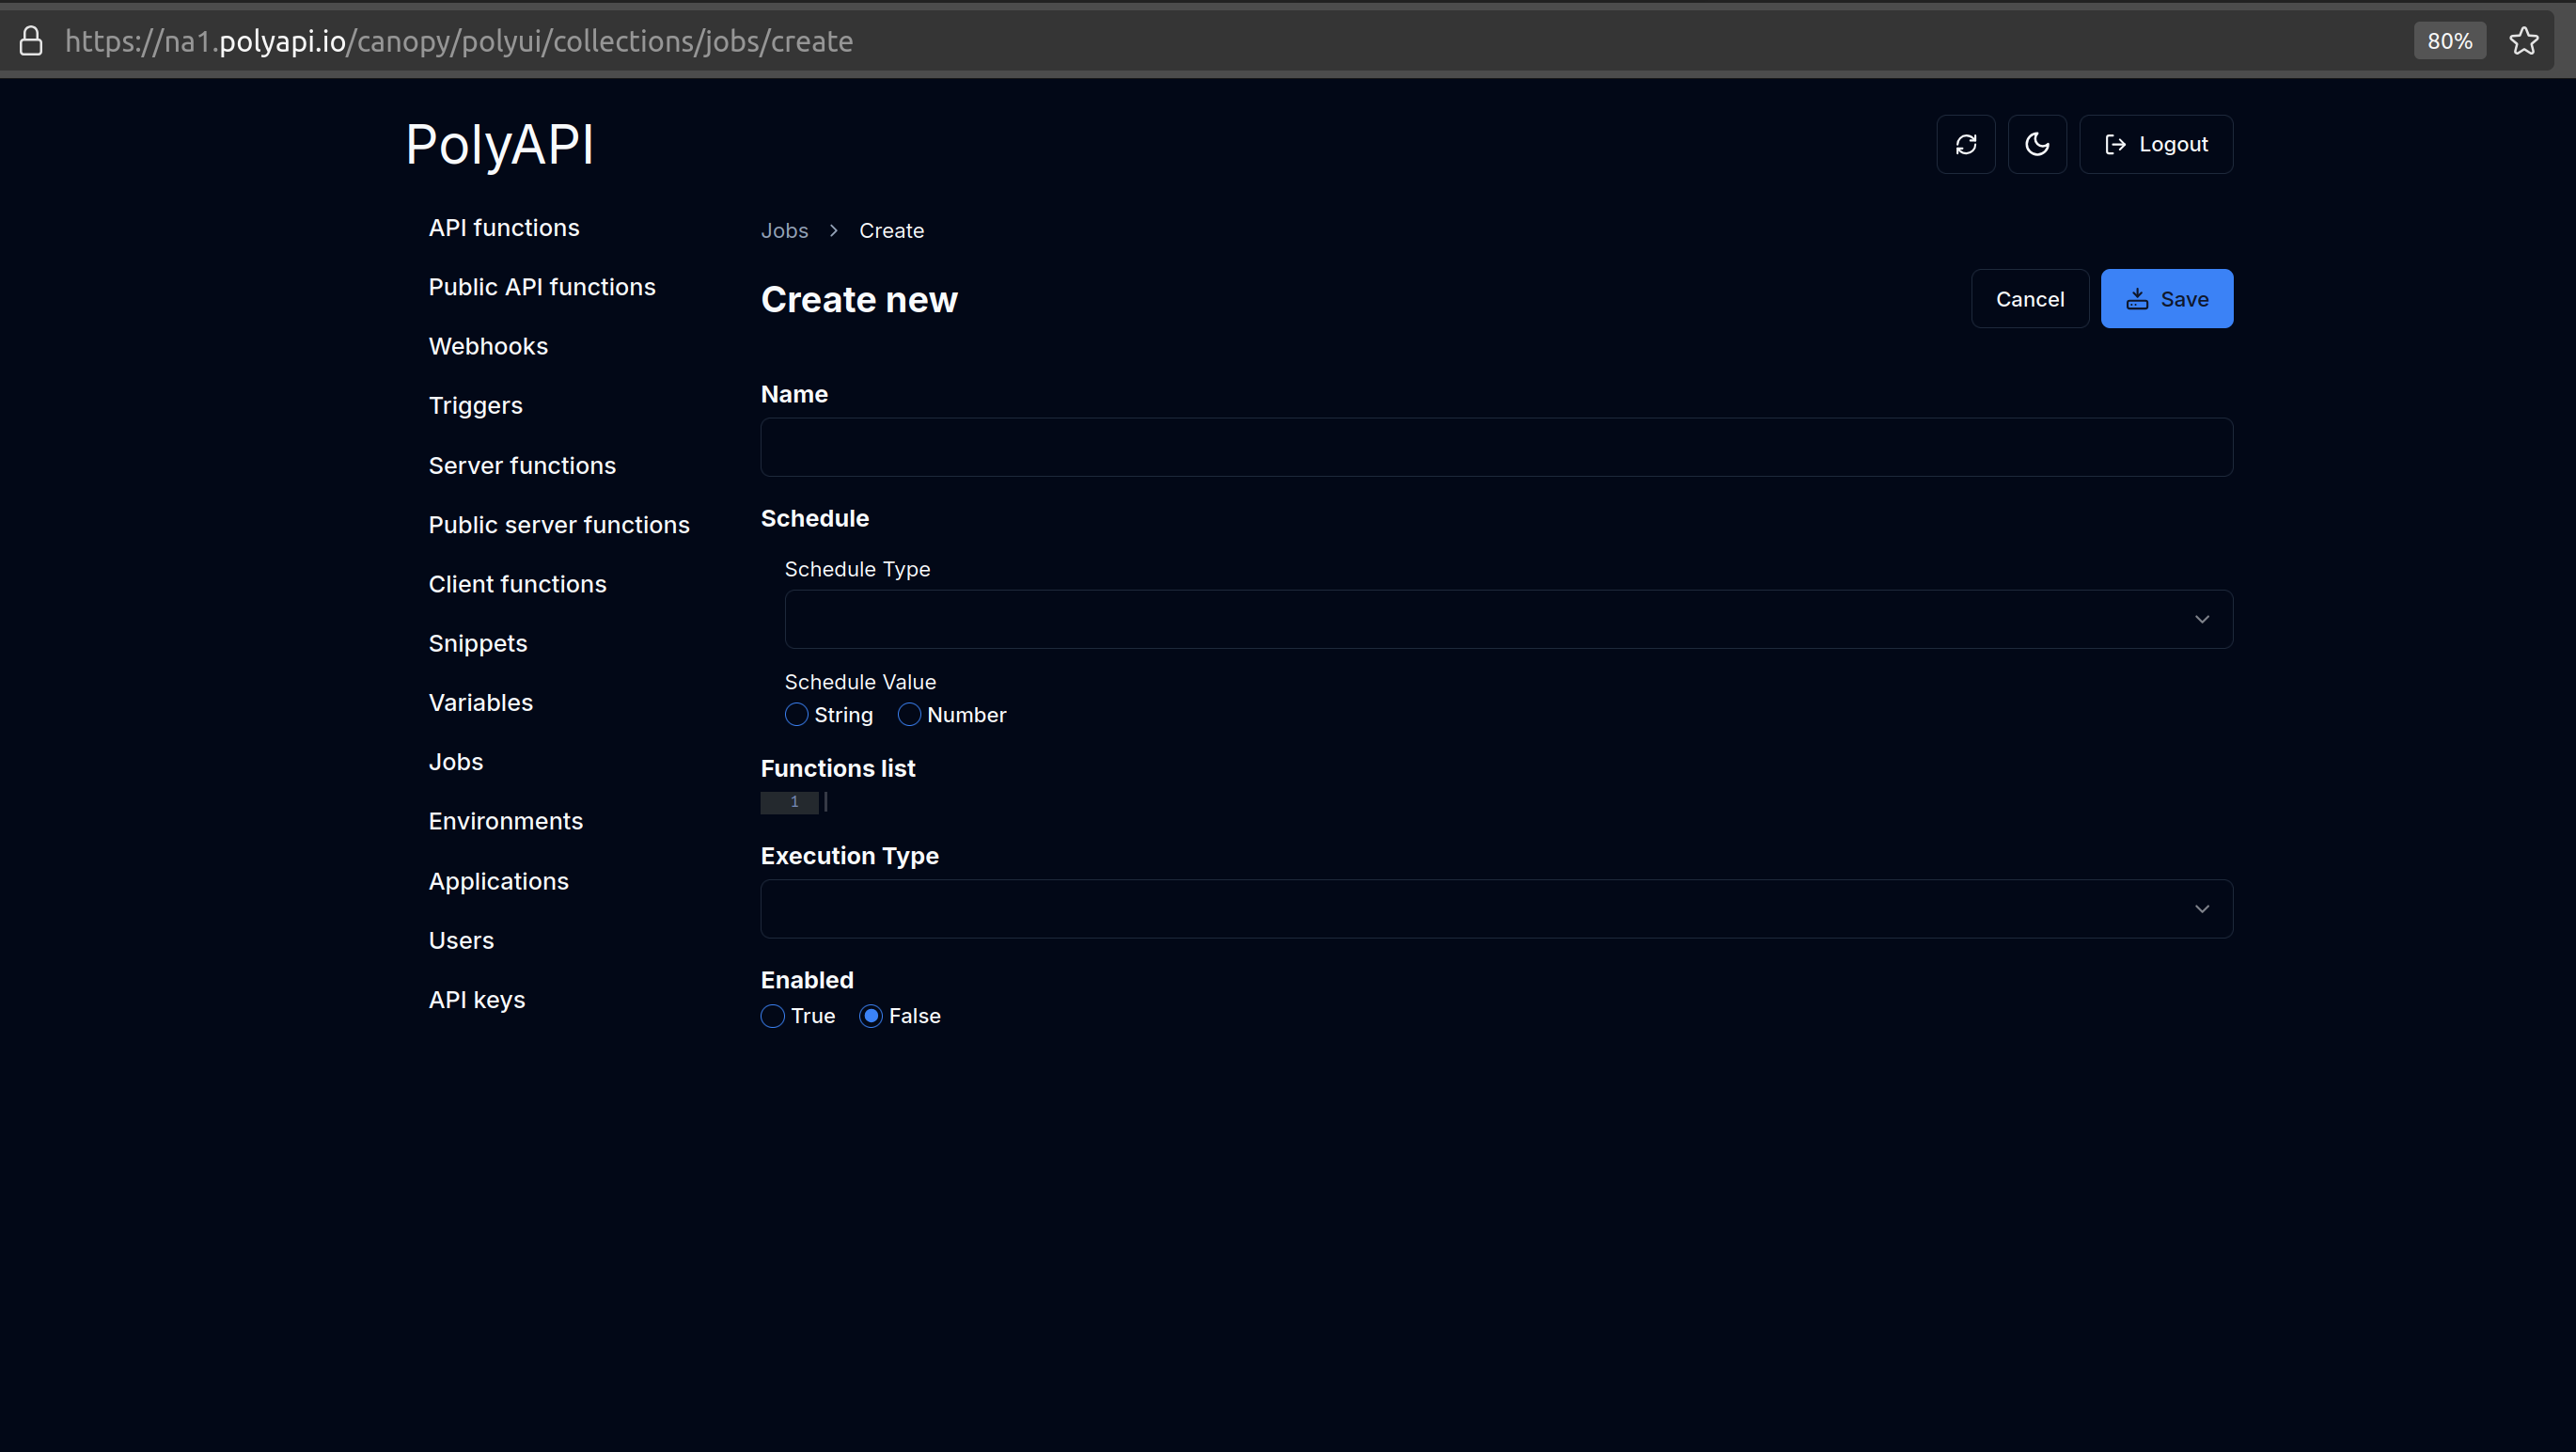
For “Name”, let’s enter a name like “Weekly Report”.
For “Schedule Type”, let’s choose “Interval” and for “Schedule Value” let’s enter “5” and select “Number”. This will run the “Weekly Report” job every 5 minutes.
Later on, we can change this to “Periodical” and set the “Schedule Value” to “5 4 * * 1” to run this every Monday at 4:05 AM. (See Crontab Guru for more info on crontab schedule expressions.)
Note
All time values should be provided in Zulu time.
Note
For the complete list of schedule types, check out our Swagger Docs for Create Job
For now, for testing, let’s set the “Schedule Type” to “Interval” and the “Schedule Value” to “5” so that our job runs every 5 minutes!
Create a Job - Functions List
For the “Functions list”, for this example we will create a new server function.
This function should follow our Event argument format (also used by webhooks and triggers) and receive three arguments:
eventPayload- The event objectheadersPayload- any relevant HTTP headersparamsPayload- any relevant URL parameters
Here’s some example code for creating a new server function in Typescript:
// npx poly function add --server --context test weeklyReport weeklyReport.ts
function weeklyReport(eventPayload, headersPayload, paramsPayload) {
  console.log("Running weekly report job!");
  return "Hello Weekly Report!";
}
Run the comment at the top of the function in your console to add this function:
$ npx poly function add --server --context test weeklyReport weeklyReport.ts
Note
For more details on how to create server functions, see Generated SDKs to create a server function in your language of choice!
Finally, let’s enter the ID of the newly created function in the “Functions list” field, along with any parameters you want to pass to your function for this job:
[{
  "id": "yourFunctionId",
  "eventPayload": {},
  "headersPayload": {},
  "paramsPayload": {}
}]
Create a Job - Execution Type / Enabled
For “Execution Type”, select “Sequential”.
For just a single function, it doesn’t matter which type you choose. But when you have multiple functions in the list, this determines whether your functions will run sequentially or in parallel.
Then, select “True” for “Enabled” to turn on your job.
Finally, click “Save”.
Updating / Deleting a Job
After clicking save, you should see your job’s detail page like this:
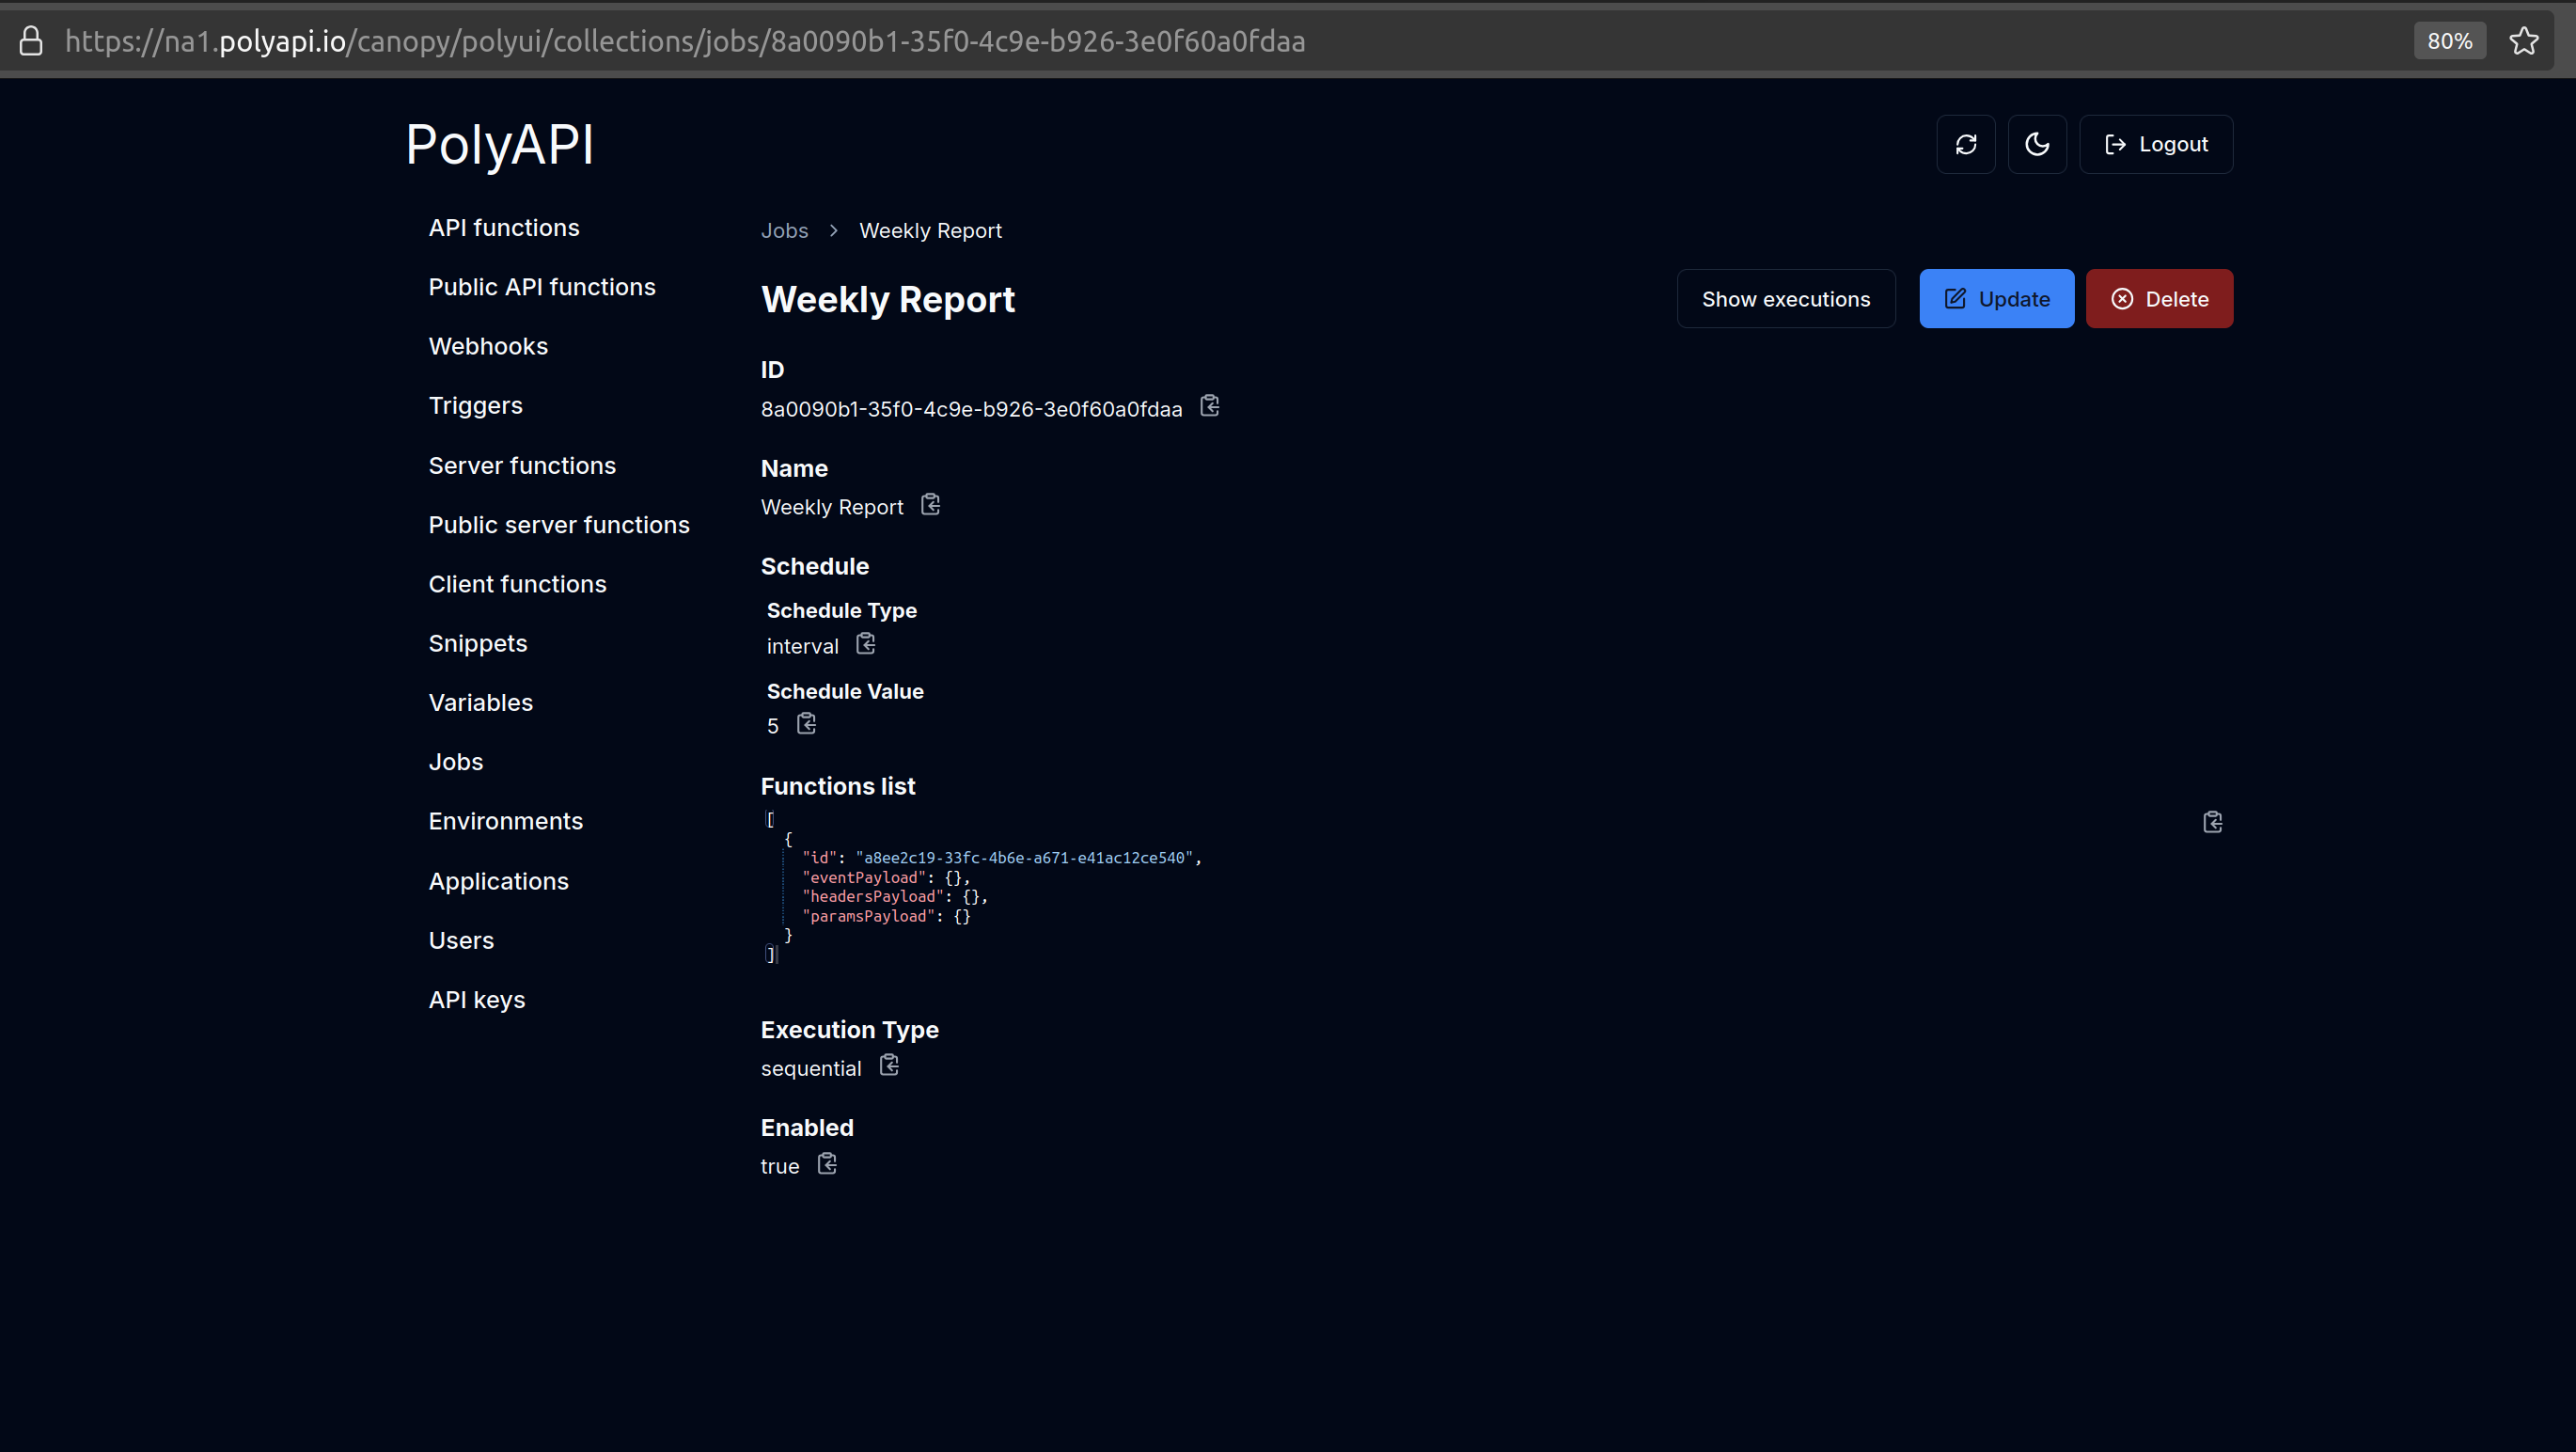
Click “Update” to update your job or “Delete” to delete it.
Conclusion
That’s it! You’ve now created your first Job on PolyAPI!
Now, to see:
the last time your job ran
how long it took
what it’s return status was
Let’s head over to Checking Job Executions.