Managing Triggers
Triggers link Events in one part of PolyAPI from some source to some destination.
Currently, the main supported trigger in PolyAPI is from a Webhook to a Server Function.
Let’s build one!
Getting Started
To manage triggers on PolyAPI, head to this path on your instance:
/canopy/polyui/login
For example, on na1, the path would be:
https://na1.polyapi.io/canopy/polyui/login
Enter your api key to login and let’s begin!
Note
You must have the “Manage Triggers” permission to manage triggers.
Please contact your tenant administrator or support@polyapi.io if you need these permissions added!
Create a Trigger
Click “Triggers” in the sidebar. Then click “+ Create”.
You should see a screen like this:
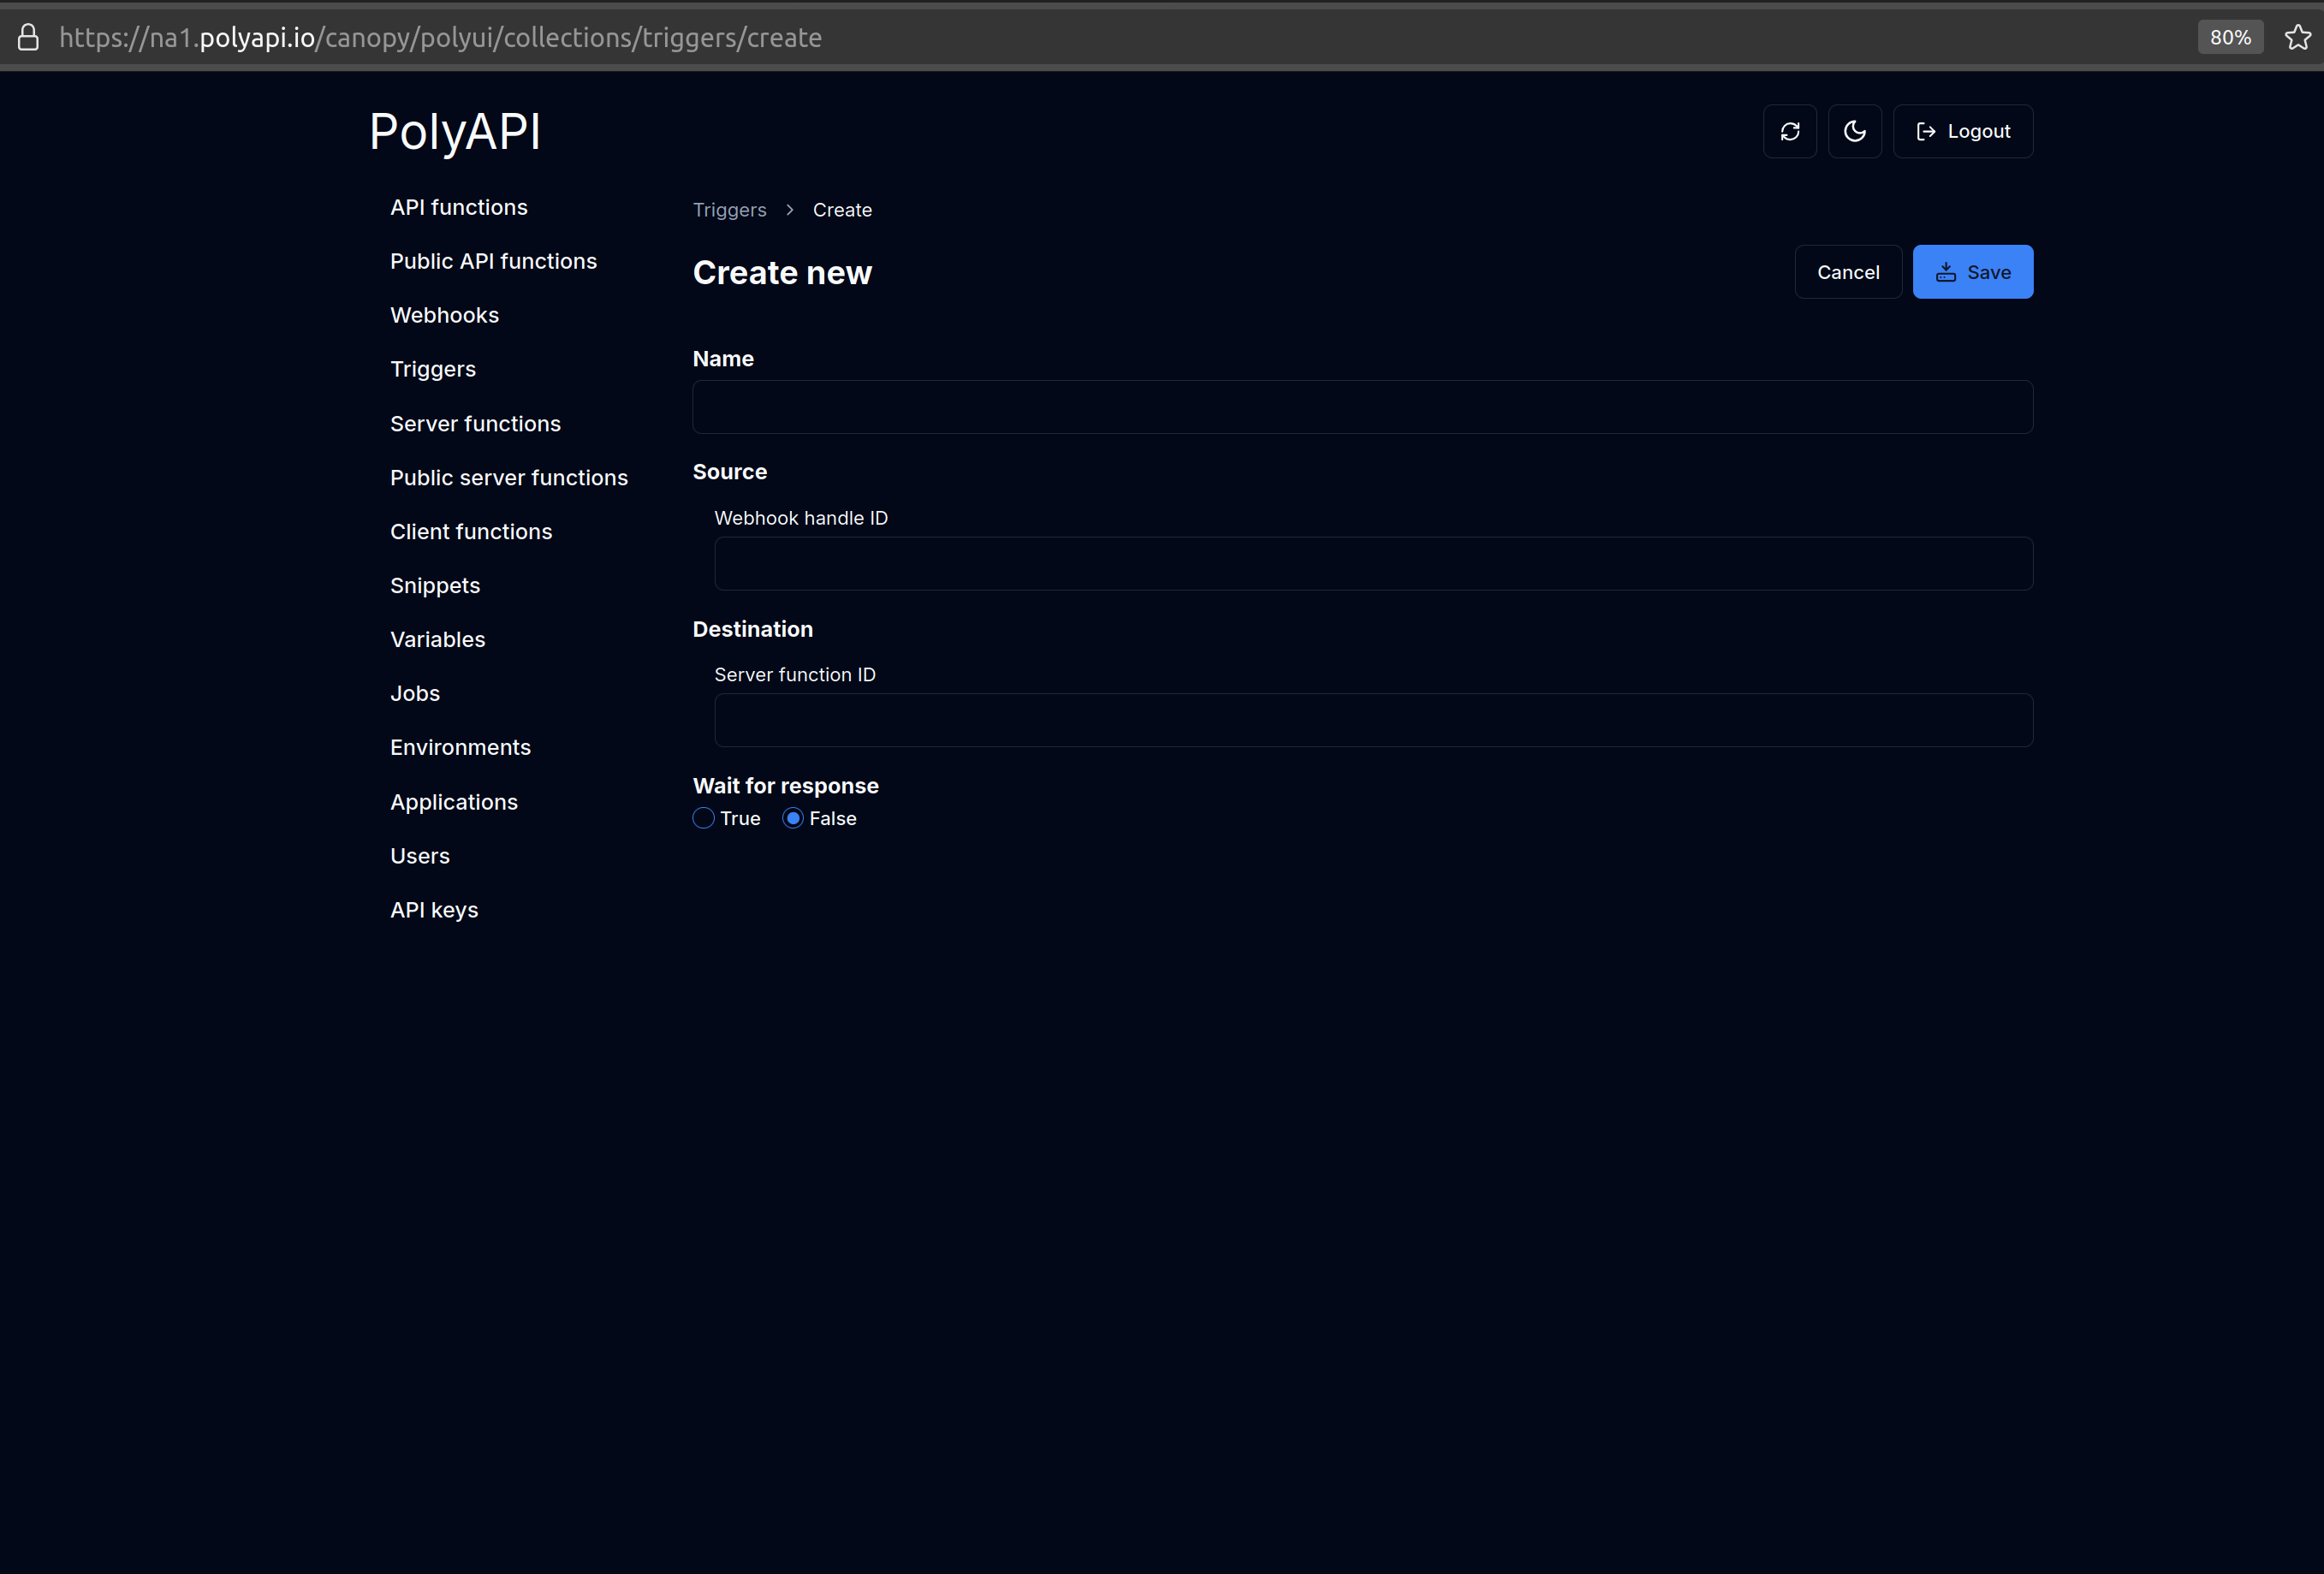
Enter “TriggerTest” for the name.
For the “Source -> Webhook Handle ID”, enter your webhook handle ID.
For the “Destination -> Server Function ID”, enter your server function ID.
Note, your server function accept the standard Poly Event object as input.
Specifically, it should accept three objects as inputs:
eventPayload
headersPayload
paramsPayload
Let’s use this example server function:
// npx poly function add --server --context test weeklyReport weeklyReport.ts
function weeklyReport(eventPayload, headersPayload, paramsPayload) {
    console.log("Running weekly report job!");
    return "Hello Weekly Report!";
}
When implementing Python server functions that handle webhook triggers, it’s crucial to define your function to accept exactly three arguments:
eventPayload, headersPayload, and paramsPayload. The execution will fail if the connected function doesn’t match this signature.
Alternatively, you can use variable-length argument syntax (*args) to accept these webhook parameters flexibly. Here’s an example:
def weekly_report(eventPayload, headersPayload, paramsPayload):
    print("Running weekly report job!")
    return "Hello Weekly Report!"

# Or using variable-length arguments:
def weekly_report(*args):
    eventPayload, headersPayload, paramsPayload = args
    print("Running weekly report job!")
    return "Hello Weekly Report!"
Normally this function runs as a cron Job as described in Jobs.
But let’s have our webhook trigger a manual run of this weekly report!
Note
For more details on how to create server functions, see Generated SDKs to create a server function in your language of choice!
The final option is “Wait for Response”.
If you want to hit your webhook, and have the HTTP request wait until the server function finishes and have the output of the server function be your HTTP response, click “True”.
If on the other hand, you want your webhook to just kick off your server function, then immediately return a 200 OK response, click “Wait for Response: False”.
For testing, let’s select “Wait for Response: True”!
Finally, click “Save”
Updating / Deleting a Trigger
After clicking “Save”, you should see your trigger’s detail page like this:
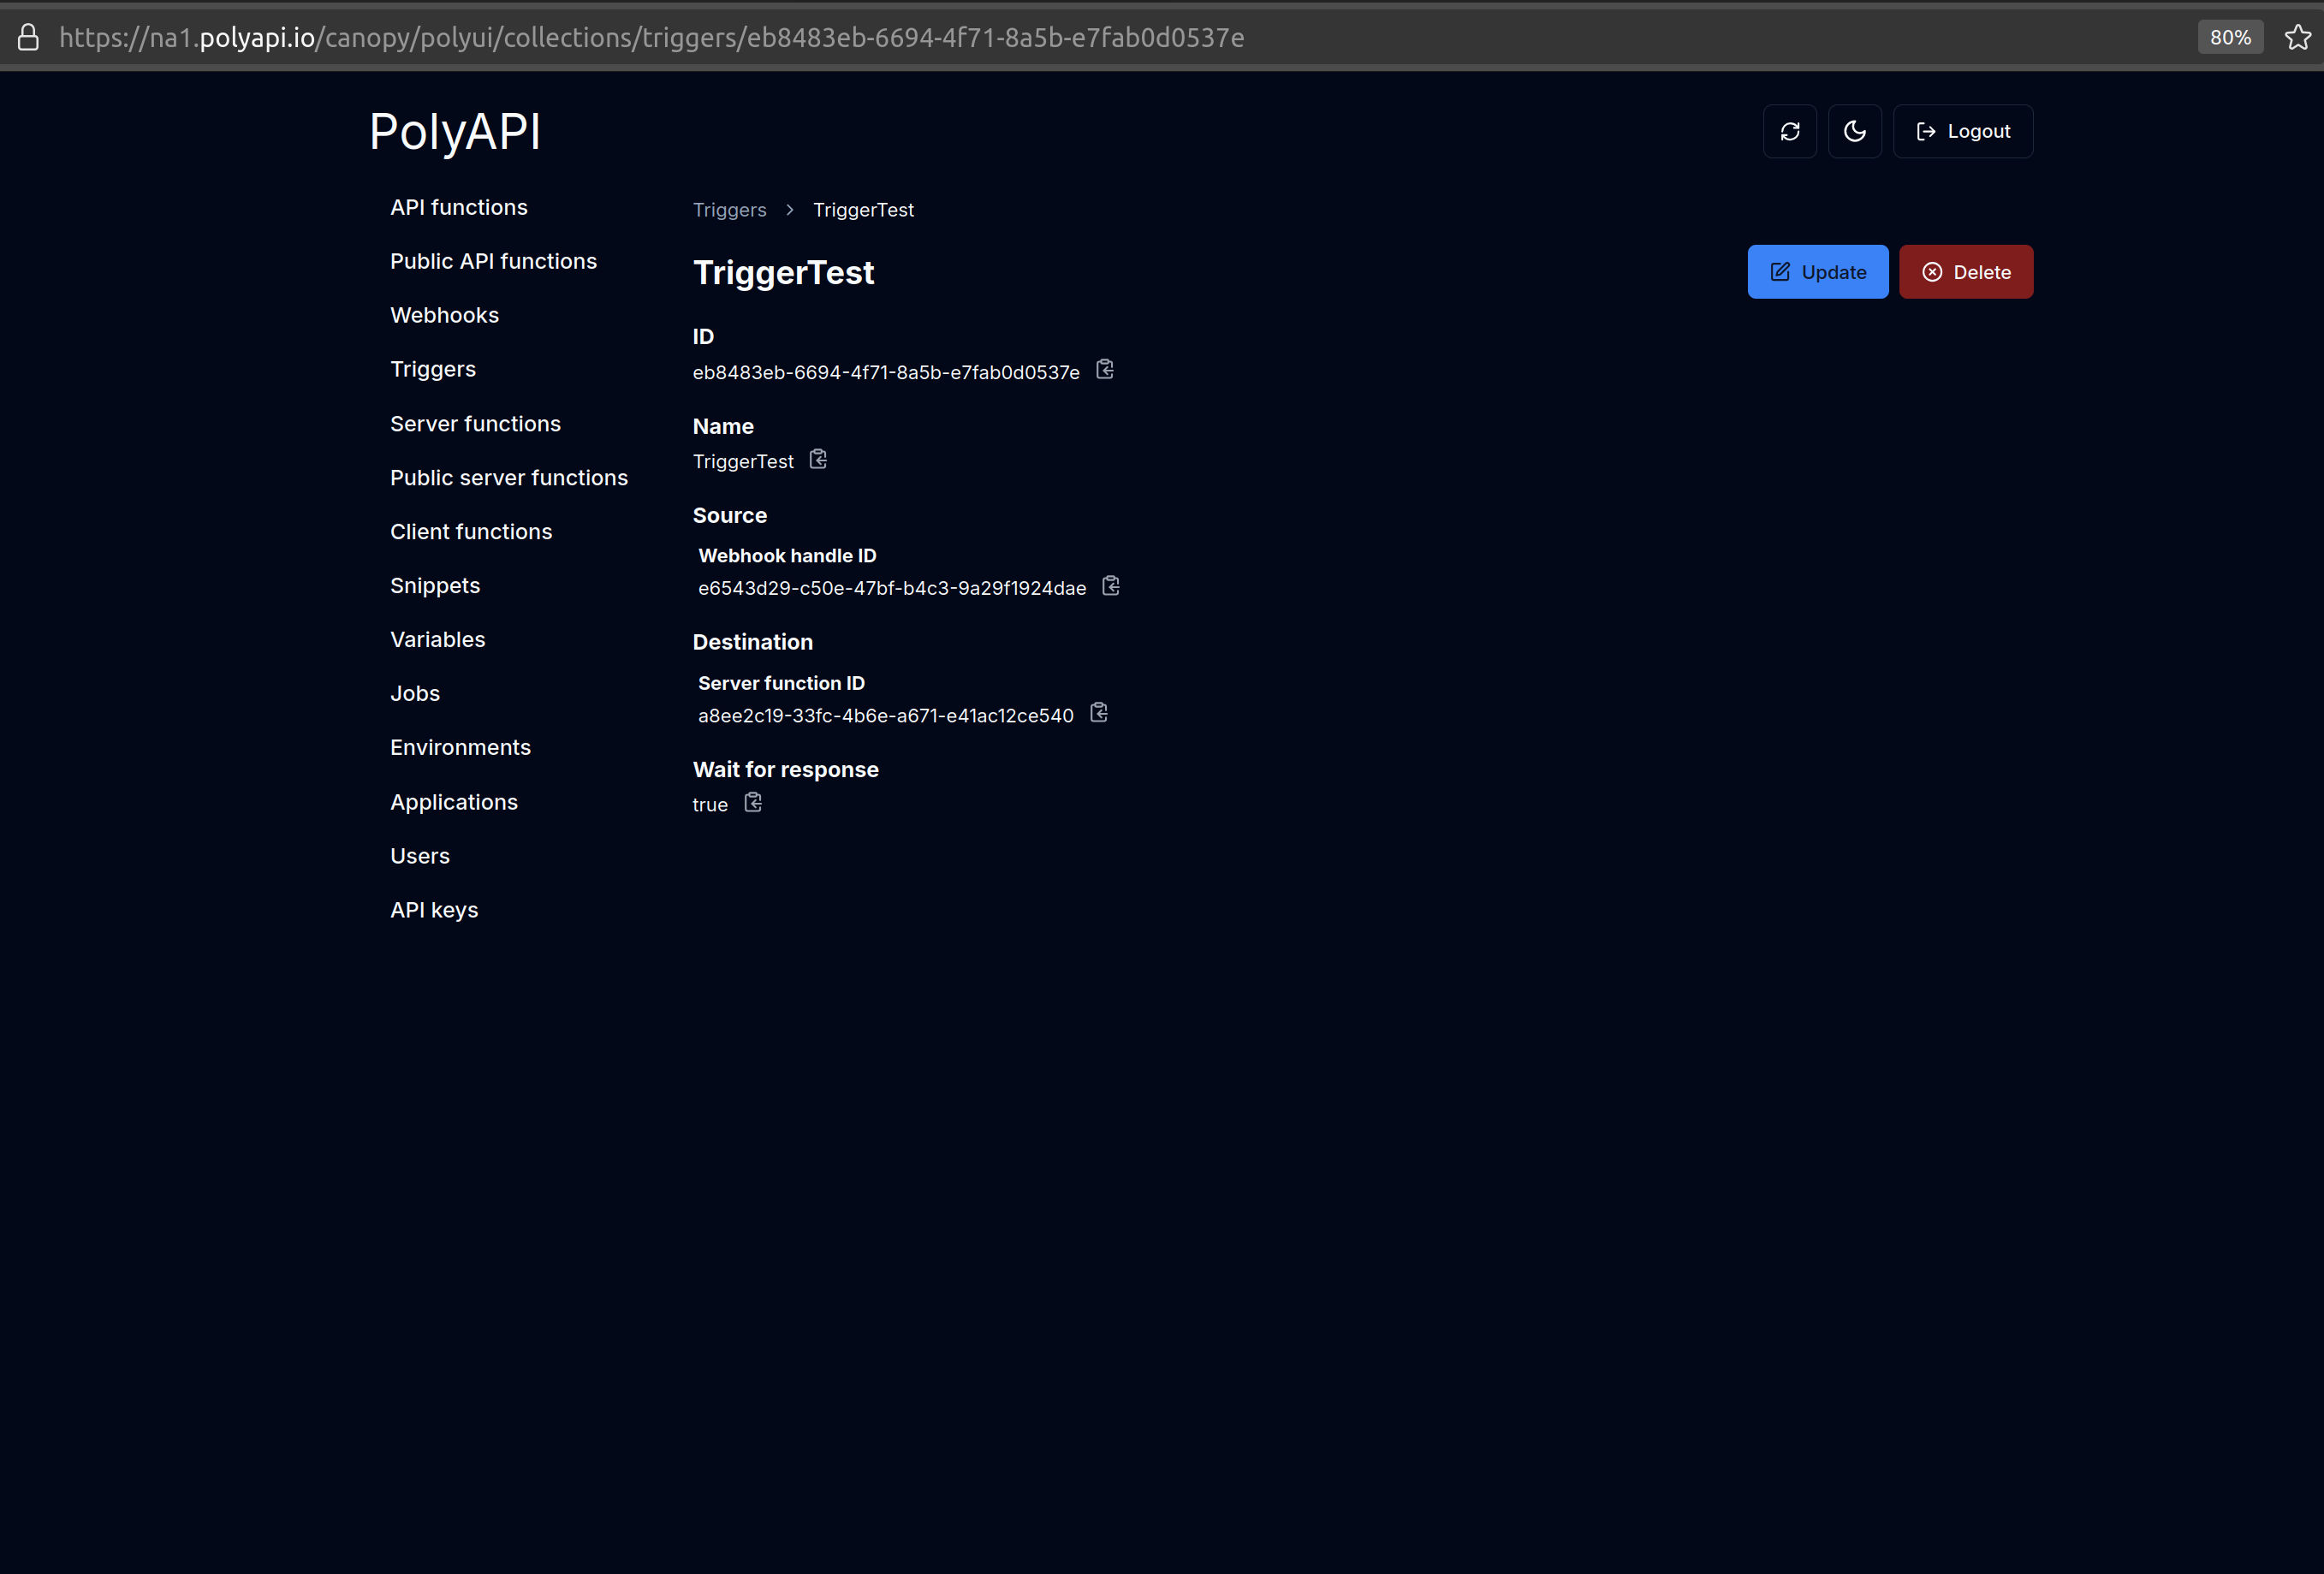
Click “Update” to update your trigger or “Delete” to delete it.
Conclusion
That’s it! You’ve now created your first Webhook and your first Trigger on PolyAPI!
Now, let’s head over to Testing Webhooks so we can see our new Webhook in action.